
4. Mass messaging
The mass messaging functionality in Smart Communications allows you to send emails, SMS messages, and push notifications to a group of customers.
Article contents:
Viewing the list of mass messaging
To view all mass messaging, go to the Mass messaging section in Smart Communications and select the mass messaging type:
The top of the page displays summary information for all mass messaging of the selected type.

|
- Number of sent mass messagings.
- Total number of receipts — the number of purchases made as a result of mass messagings, taking into account receipt attribution parameters.
- Total receipt amount — the purchase value generated by mass messagings, taking into account receipt attribution parameters.
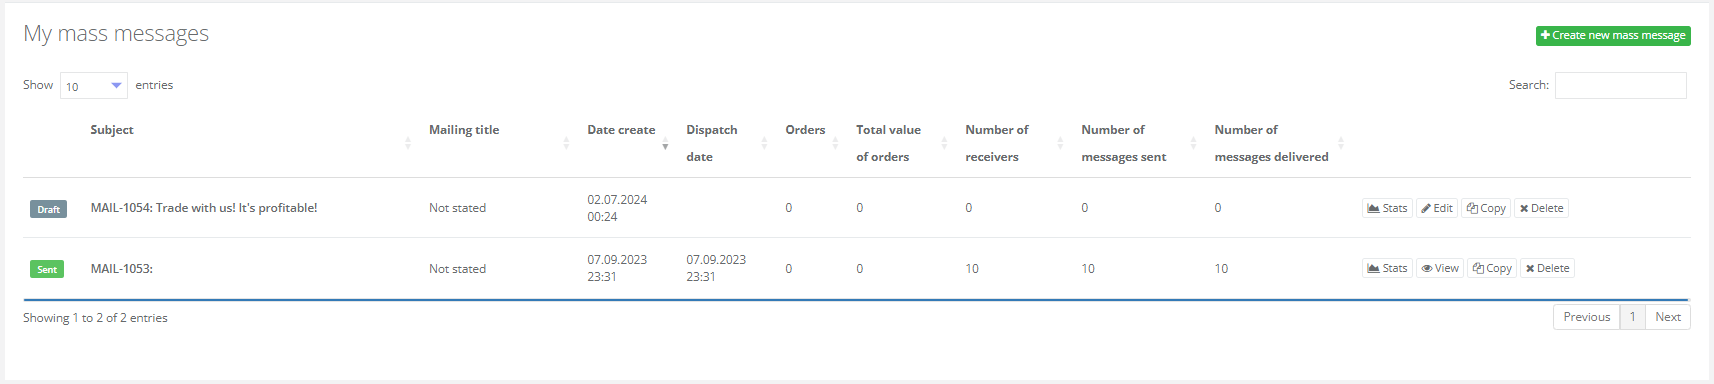
The My messagings block displays information for each individual mass messaging.
|
For each mass messaging, you can view:
- Status (Draft/Created/Collecting/Sent);
- Subject and mass messaging name (if specified when creating the mass messaging);
- Creation date and send date;
- Number and total amount of receipts associated with this mass messaging;
- Number of recipients;
- Number of sent and delivered messages.
The following actions are available for each mass messaging:
 View the mass messaging report;
 View mass messaging parameters set during creation for a sent mass messaging , or
  make adjustments for a draft mass messaging;
 Copy the mass messaging (create a new mass messaging based on an existing one);
 Delete the mass messaging.
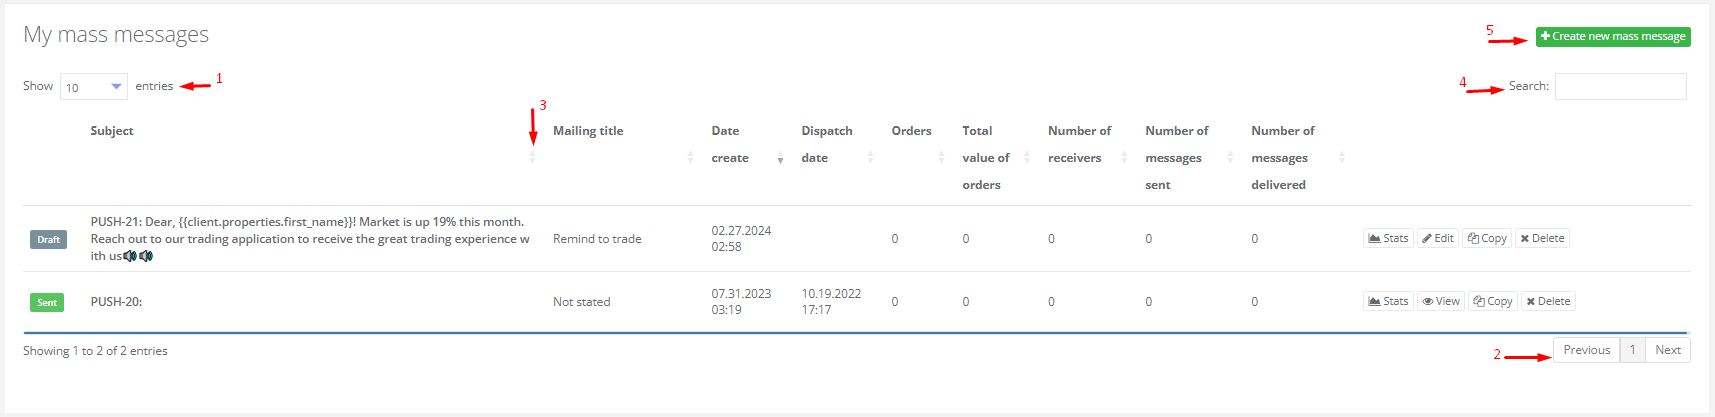
The My messagings block also provides the following capabilities:
|
- Set the number of records displayed per page (10, 25, 50, or 100);
- View information on other pages;
- Sort records in ascending/descending order by any column. For example:
- Sort all mass messaging alphabetically by subject.
- Display mass messaging with the highest receipt amounts first.
- Filter the mass messaging list by additional criteria. For example, show only mass messaging containing discount information.
- Create a new mass messaging.
Creating a mass messaging
There are several ways to create a mass messaging:
- From the Mass messaging section;
- From the All customers section;
- From the Messaging calendar section;
- By copying an existing mass messaging.
1. Creating a mass messaging from the Mass messaging section
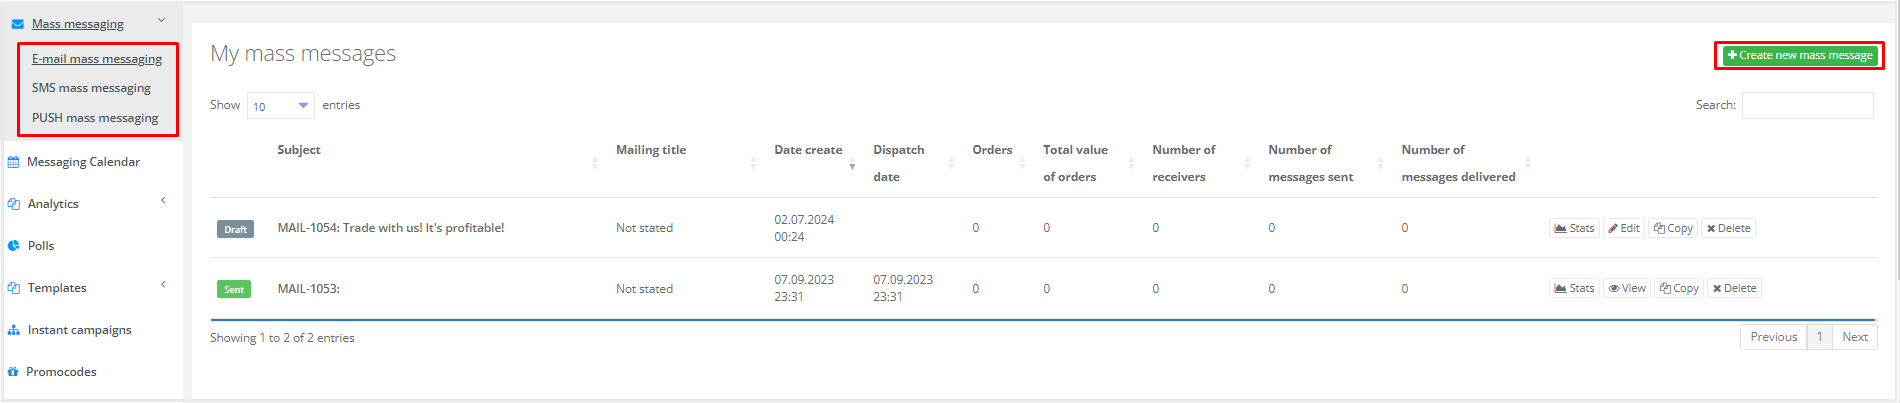
- Select Mass messaging in the main menu. Then choose one of the three available mass messaging types: email, SMS, or push.
|
2. Click the Create new mass messaging button.
3. In the window that opens, add customers who should receive the mass messaging and fill in the required sections. For more details, see Creating a new segment.
2. Creating a mass messaging from the All customers section
- Create a segment in the Segment builder, or open an existing segment in the Customers > User segments section.
- In the Customers block, click the button corresponding to the mass messaging type you want to create:
 Create an email mass messaging;
 Create an SMS mass messaging;
 Create a push mass messaging.
3. Creating a mass messaging from the Messaging calendar section
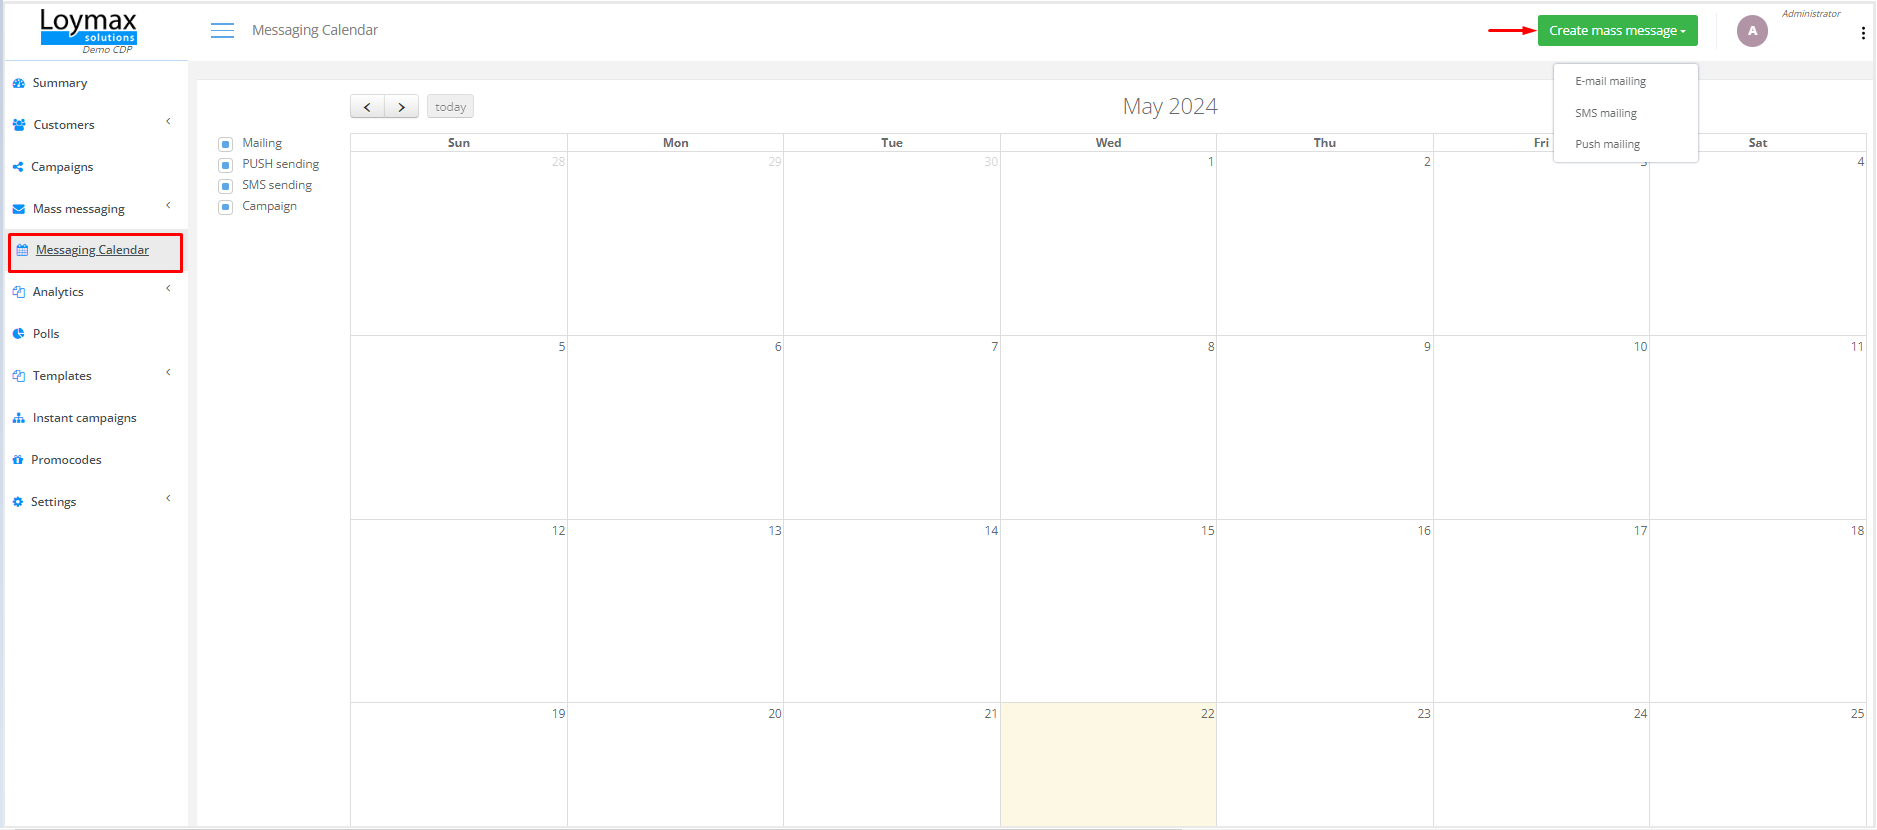
- Select the Messaging calendar section in the main menu.
|
2. Click the Create mass messaging button.
3. Select the mass messaging type.
4. In the window that opens, add customers who should receive the mass messaging and fill in the required sections. For more details, see Creating a new segment.
4. Creating a mass messaging by copying
- Select Mass messaging in the main menu. Then choose the mass messaging type: email, SMS, or push.
- Select the mass messaging you want to copy. Click the Copy button at the end of the corresponding row to open the mass messaging editing window.
Sending a mass messaging to customers
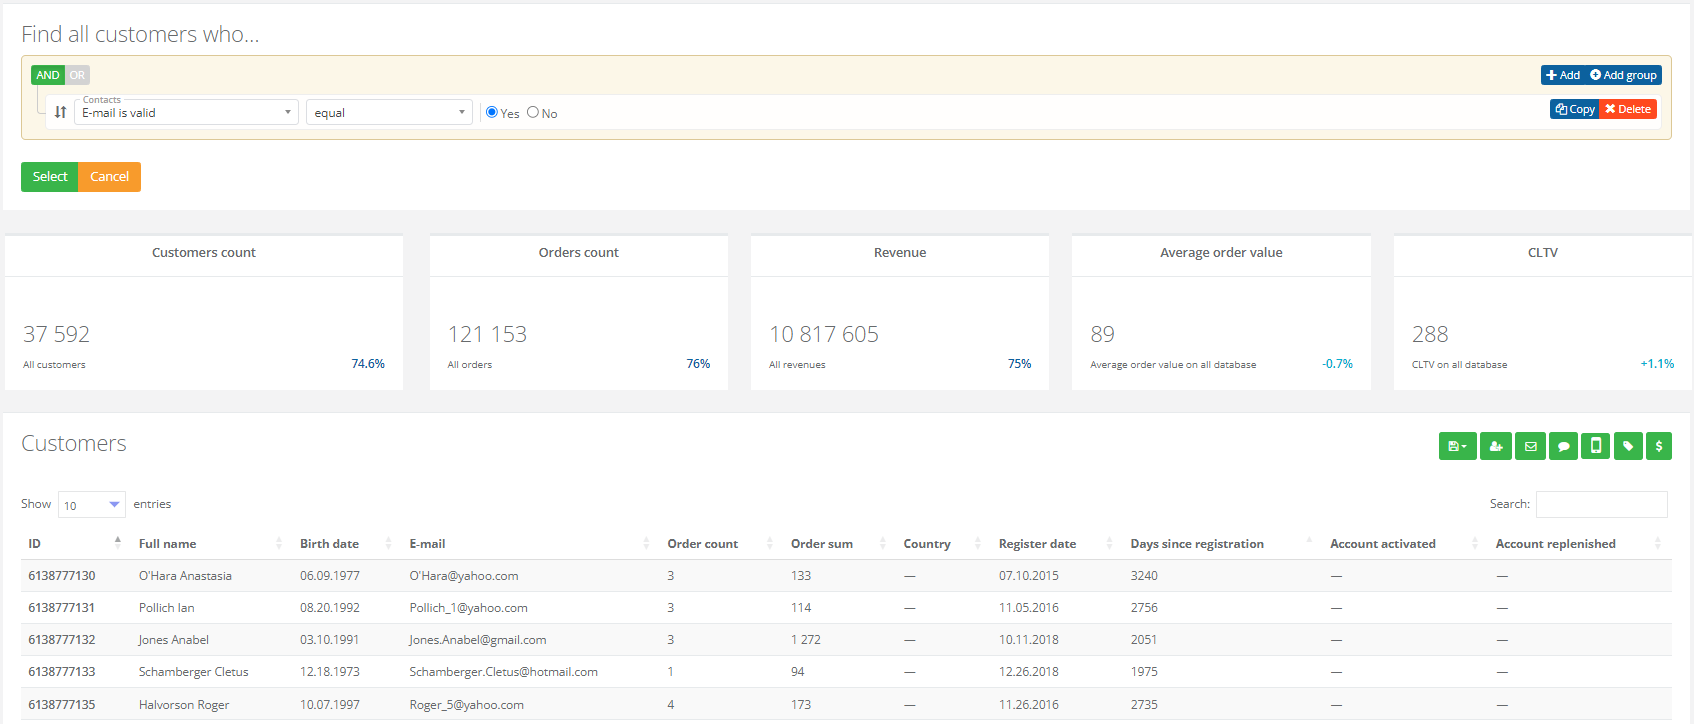
After adding customers who should receive the mass messaging , the page will display a list of selected customers along with summary information about them.
|
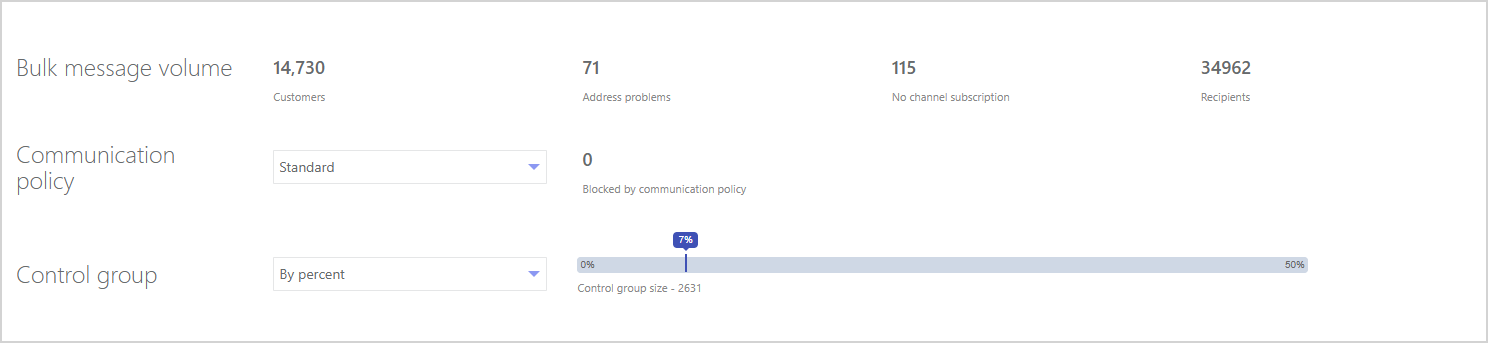
The block below allows you to evaluate the bulk message volume.
|
- Customers — customers who may receive the mass messaging .
- Address problems — customers with no address specified or with an incorrect address.
- No channel subscription — customers who have opted out and will not receive the mass messaging .
- Recipients — the number of customers who will actually receive the mass messaging .
- You can select a communication policy for the mass messaging (if this functionality is enabled), which defines the frequency of mass messaging to customers. By default, the Standard policy is applied. It is created automatically in the system and contains no rules.
- You can also set the size of the control group to evaluate the impact of communication on customer behavior. To form a representative control group based on specific characteristics (for example, age, gender, registration date), you can use the stratification mechanism. Clicking the Show stratification parameters button opens a modal window with settings for forming the control group. For more details, see the article.
For example, 14,730 customers were included in the segment. This does not mean that exactly that many emails will be sent.
- 71 customers have no address.
- The control group size is set to 7%, meaning 7% of customers will not receive the message.
- Some customers have unsubscribed from communications.
This leaves 13,257 customers who will receive the mass messaging .