
Mailing personalization via Template Engine
The template engine allows to customize text of messages (email, SMS, push) in mass mailings and campaigns. Customers will see information in a communication relevant specifically to them.
Contents:
- Personalization
- Template Engine
- Variables in Smart Communications
- Macros
- Inserting Variables or Macros into a Message
- Preview
- Control Structures
Personalization
Personalization technology allows to tailor messages for each individual customer. Loymax Smart Communications adjusts the message text and generates a relevant offer for the customer, selecting the most suitable moment for message sending if required.
Example:
Within the same mailing with the recommended products:
- One customer receives a message (based on the purchase history) recommending to buy razor blades, along with a promotional text noting that retail outlets in the city are running a "3 for 2" promotion.
- Another customer receives a message (also based on the purchase history) recommending a phone charger, including a promo text about a newly opened pickup point in their city.
Loymax Smart Communications provides tools for personalization:
- Template engine constructs;
- Product recommendations.
Template Engine
The template engine includes:
- Variables — data about customers, their receipts, and receipt items. For example, variables can display the customer’s name in the message text;
- Macros — functions that show information about promo codes, polls, etc.;
- Control Structures — loops, conditions, filters.
Example of using a variable in a message:
Hello, {{client.properties.full_name}}.
When the message is sent, the variable will be replaced with an actual value, for example:
Hello, John Smith.
Variables in Smart Communications
Variables allow to insert the following data into a message text (and for emails, also into the subject field):
- Information from the customer profile:
- Customer attributes and metrics;
- Links for subscription management;
- Attributes and content from the latest receipt and/or order;
- Dates;
- Any other attributes;
- Information about the customer’s receipts;
- Data about receipt items;
- Data about product categories.
There are two types of variables:
- System — used to access system fields;
- Custom — used to access custom fields. More information about fields can be found here.
Variable format:
{{variable_name}}
System Variables
Smart Communications supports the following system variables:
Variable | Purpose |
|---|---|
{{client.properties.full_name}} | Customer's full name |
{{client.properties.last_name}} | Customer's last name |
{{client.properties.first_name}} | Customer's first name |
{{client.properties.middle_name}} | Customer's middle name |
{{client.properties.register_date}} | Registration date |
{{client.properties.city}} | Customer's city |
{{client.properties.zip}} | Customer's postal code |
{{client.properties.email}} | Customer's email |
{{client.properties.password}} | Customer's password |
{{client.properties.phone}} | Customer's phone number |
{{client.properties.order_cnt}} | Number of receipts |
{{client.properties.order_sum}} | Total amount across all customer receipts |
{{client.orders.first.date}} | Date of the first receipt |
{{client.orders.last.date}} | Date of the last receipt |
{{client.orders.last.number}} | Last receipt number |
{{client.properties.rating}} | Customer score |
{{client.links.profile}} | Link to the customer profile in the Platform |
{{client.links.unsubscribe}} | Link to subscription management |
{{client.links.web_version}} | Link to the web version of the email |
{{client.properties.bonus_active}} | Number of active bonus points |
{{client.properties.bonus_expect_activate}} | Number of bonus points pending activation |
{{client.properties.bonus_expect_deactivate}} | Number of bonus points pending deactivation |
{{client.properties.bonus_expect_deactivate_date}} | Date for deactivation of bonus points |
{{client.properties.bonus_expect_deactivate_next}} | Number of bonus points to be deactivated soon |
{{client.eventContext.<field_code>}} | Data from the event context |
{{client.containers.webcart.items}} | Cart contents |
| {{client.properties.eorder_cnt}} | Number of customer orders |
| {{client.properties.eorder_sum}} | Total amount across all customer orders |
| {{client.eorders.first.date}} | Date of the first order |
| {{client.eorders.last.date}} | Date of the last order |
| {{client.eorders.first.number}} | First order number |
| {{client.eorders.last.number}} | Last order number |
| {{client.eorders.first.<field_code>}} | Attribute value from the first order |
| {{client.eorders.last.<field_code>}} | Attribute value from the last order |
| {{client.eorders.first.items}} | Content of the first order |
| {{client.eorders.last.items}} | Content of the last order |
Custom Variables
Access to custom fields Clients/Cheques/Cheque items/Categories is carried out using their code in a structure like {{client.properties.<field_code>}}. Example:
{{client.properties.eye_color}}
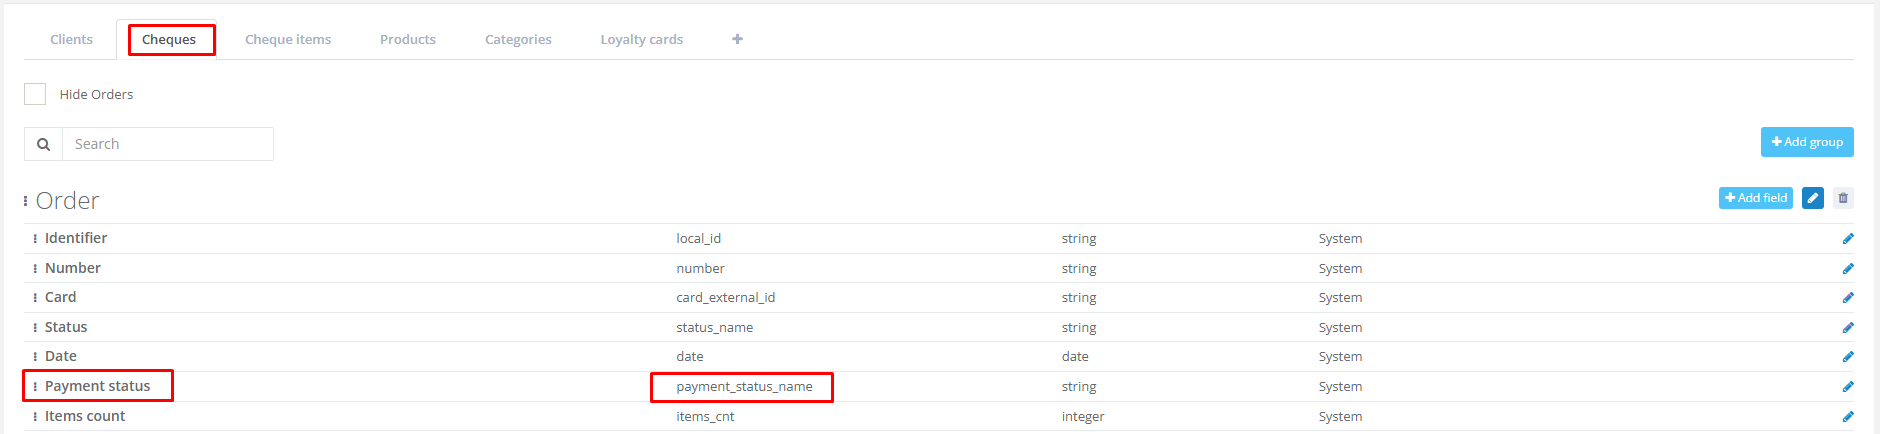
Field codes can be found in the Settings > Fields section in the tabs: Clients/Cheques/Cheque items/Categories. For example, the field code for the receipt attribute "Payment status" is "payment_status_name".
To form a variable, use the following format:
- {{client.properties.<field_code>}} — attribute value from the customer's profile;
- {{client.orders.first.<field_code>}} — attribute value in the customer's first receipt;
- {{client.orders.last.<field_code>}} — attribute value in the customer's last receipt.
To display product attribute values from the abandoned cart, first receipt, last receipt, or product category, use loops.
Default Value
For the string type attributes, you can specify a default value that will be used when the attribute is empty. This value will appear in the message text if the attribute is not filled in. For example, you can address the customer by name, and if the name is unknown, use the default value:
{{client.properties.full_name|default('Dear Customer')}
Macros
Macros are small commands that allow performing scripted actions within the System. For example, the macro {{client.promocode('promocode group')}} finds and returns a promocode from the specified group.
System Macros
The following macros are available in Smart Communications:
Macro | Purpose |
|---|---|
{{"now"|date('format')}} | Current date |
{{client.promocode('promo code group')}} | Issue a promo code to the customer from the specified promo code group |
{{client.last_promocode('promo code group')}} | Last issued promo code from the specified group |
{{client.last_campaign_promocode('promo code group')}} | Last promo code issued to the customer from the specified group within this campaign |
{{client.template_constant('name')}} | Regional constant |
{{client.poll('POLL-identifier')}} | Survey link |
{{client.loyaltyCard.lastActive.number}} | Information about the customer’s active loyalty card |
Date Format
Date type fields can be displayed in different formats. To define the format, use any combination of the following values:
- Year:
- y — 2 digits (e.g., 97, 20);
- Y — 4 digits (e.g., 1997, 2020);
- m — month (from 01 to 12);
- d — day (from 01 to 31);
- h — hour;
- i — minute;
- s — second.
Example 1. Date display in a message
With the format 'Y-m-d', the date will be shown as '2020-10-20'. With 'd.m.Y h:i' — '20.10.2020 11:56'.
Example of using the macro Thank the customer for the last order:
Thank you for your order dated {{client.orders.last.date|date('d.m.Y')}}!
The customer will receive the following message:
Thank you for your order dated 29.06.2020!
Example 2. Displaying a date several days after the current date
To show a date that is one day after today in the message, use the following macro:
{{"now"|date_modify('+1 day')|date('Y-m-d')}}
This will display tomorrow’s date in the message sent to the customer.
Example 3. Displaying a date — one month after the customer’s registration date
Displaying a date one month after the customer’s registration date:
{{client.properties.register_date|date_modify('+1 month')|date('Y-m-d')}}
Inserting Variables or Macros into a Message
There is a flag button in the editors for all types of messages. By clicking this button, there opens a list of available system variables and macros:
 |
To insert a custom variable, you should manually type it.
Preview
To see how the message will look like with variables and macros replaced by actual values, use the Message Preview button. |  |
You can also preview the message for a specific customer. To do this, enter the customer's last name/first name/phone number/email/internal identifier (local_id) in the Client field. To ensure unambiguous search results, it is recommended to search by phone number, email, or internal identifier of the customer. | 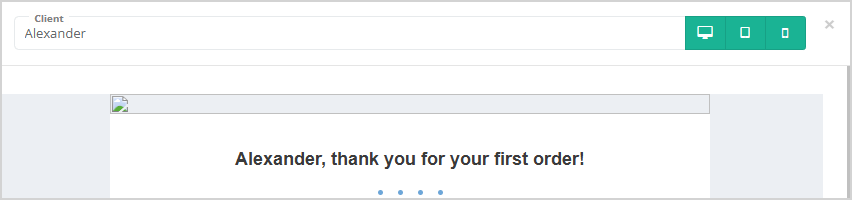 |
Control Structures
Control structures allow you to create more complex templates based on variables and macros. These include for-loops, conditions (if/elseif/else), and filters. Control structures are written inside {% ... %} blocks.
Variables
To reuse the same expression multiple times in a message, you can use a variable. For example, let's use a variable webcart for items in the shopping cart:
{% set webcart = client.containers.webcart.items %}
Loops
Use loops in the following cases:
- To display product attributes from the customer's first or last receipt;
- To display product attributes from the shopping cart;
- To display product category attributes;
- To display information about all active cards if the customer has more than one.
For example, it is possible to display the names of all products in the customer's last receipt:
{% for item in client.orders.last.items %}
{{item.name}}
{% endfor %}
Display product names and colors from the shopping cart:
{% set webcart = client.containers.webcart.items %}
{% for item in webcart %}
{{item.name}}
{{item.color}}
{% endfor %}
Display category names for all products in the last receipt:
{% for item in client.orders.last.items %}
{{item.category.name}}
{% endfor %}
Display information about all active cards:
{% for card in client.loyaltyCard.items %}
{{card.number}}
{% endfor %}
Conditions
It is possible to display only data that meet certain criteria. For example, issue a promocode only to customers from Birmingham:
{% if client.properties.city == 'Birmingham' %}
{{client.promocode('promo code group')}}
{% endif %}
Here are some condition variants:
- {% If client.properties.city == 'Birmingham' %} — if the customer is from Birmingham;
- {% If client.properties.city %} — if the city is specified in the customer's details;
- {% If not client.properties.city %} — if the city is not specified in the customer's details;
- {% If client.properties.city == 'Birmingham' OR client.properties.city == 'Bristol' %} — if the customer is from Birmingham or Bristol;
- {% If client.properties.city == 'Birmingham' AND client.properties.first_name == 'Mary' %} — if the customer is from Birmingham and named Mary.
Filters
The following filters are available for arrays:
- sortArray — allows sorting an array by attribute values:
- sortArray('date', true) — sort by date in descending order;
- sortArray('date', false) — sort by date in ascending order (it is possible to sort by other attributes besides the date);
- get — displays a set number of elements:
- get(10) — display the first 10 elements of the array;
- date_diff('date') — displays the number of days between two dates. For example, display the number of days since 2020-11-11 until today:
{{"now"|date('Y-m-d')|date_diff('2020-11-11')}}
Displaying Cart Information
Example of using filters: display the name, image, and price of 10 products from the cart that were added first:
{% set webcart = client.containers.webcart.items|sortArray('date', false)|get(10) %}
{% for item in webcart %}
{{item.name}}
{{item.image_url}}
{{item.price}}
{% endfor %}
To make the product name a hyperlink, use the <a> tag with the href attribute:
<a href="{{item.product_url}}">{{item.name}}</a>